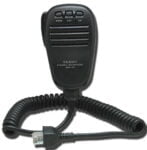
Yaesu MH31 Better Audio
 There are many comments concerning the audio quality and/or volume when using a standard Yaesu MH31 microphone. This particular microphone is shipped with a lot of Yaesu radios as standard. This mod is described elsewhere online, however this is my attempt at improving the MH31.
The unmodified microphone uses a cheap dynamic element, which is placed behind a cotton wool type pad to keep moisture and dirt out, also the hole in the front of the mic serves to reduce sound entering the mic even more!
 The stock element needs to be replaced with something better, in this case we use an electret mic element. Electret mic elements require a voltage to work, fortunately, a suitable voltage is available inside the mic being supplied from the radio via the cable. We also need a resistor and three capacitors.
Begin by removing the cable from the microphone, being an RJ45 connector it has a small plastic clip which you depress and the plug comes away freely. Next remove the screws and separate the two halves of the casing, remove the PTT bar, then the three screws securing the PCB and remove it. At this point remove the mic element from the front half of the casing, the wires can also be de-soldered from the PCB and set aside.
 With the PCB removed you need to remove the capacitor on the PCB marked as C1, this is located between the tone switch and the cable jack.
Once this is removed you need to de-solder the short wire connected to the end terminal of the switch – don’t remove the wire from the PCB as it will be used later.
 Take a small 1uF electrolytic capacitor and solder the negative lead to the tone switch at the position you removed the wire, keep it as close as possible to the switch as there isn’t a lot of room once the mic is re-assembled.
Solder the positive lead from this capacitor to the wire that you removed from the switch. Next you need to solder a 47nF ceramic capacitor between the unused terminal of the switch (opposite end) and to the point where the wire & 1uF capacitor are connected together.
 Now we turn our attention to the mic element. Electret mic elements are a fraction of the size of the dynamic elements used in the MH31 so we need to find a way of securely mounting it into the mic casing.
Here I’ve just cut a piece of cardboard roughly to size and made a hole for the element. Once happy with the fit, I simply used hot glue to secure into position. A word of warning, let it cool down before you touch it – don’t ask how I know 🙂
 The PCB can now be refitted to the mic casing as the rest of the modification can be carried out with the PCB in place. Take an 8.2K resistor and solder one end onto pin 6 of the mic cable jack, it’s the second pin on the first row, this pin provides the 5v power source. Be sure to use some sleeving on the resistor leads to prevent them touching and causing short circuits.
The other end of the resistor is soldered to PCB mic connection pad nearest the top of the mic, solder the positive lead of the mic element an one lead of a 1nF ceramic capacitor to the same place. The other lead of the capacitor and the mic element negative are soldered to the other mic connection pad. Note: do not put the positive feed to the bottom of the two pads as this is a ground connection. Study the photo if unsure.
Refit the PTT bar and re-assemble the two halves of the mic, plug it in and give it an on air test.
That’s it – job done!